MQTT-GaragePi
Documentation for MQTT-GaragePi
Project maintained by commputethis Hosted on GitHub Pages — Theme by mattgraham
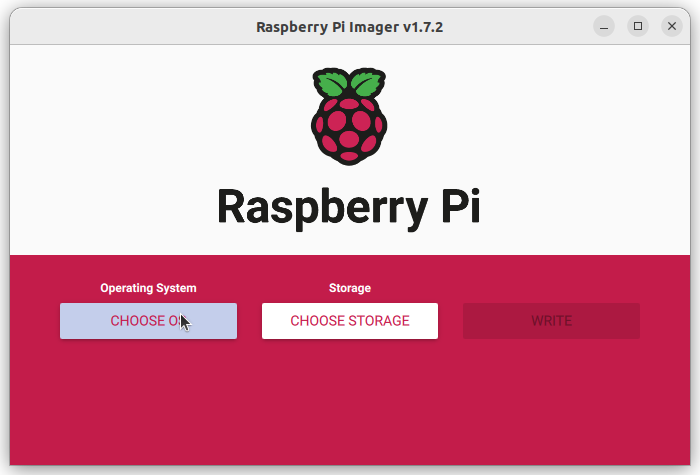
Install/Configure Raspberry Pi for GaragePi
Install and configure Raspberry Pi OS Lite
- Download and install Imager from raspberrypi.org.
- Insert the SD card you want to use for your GaragePi into your computer
- 8GB or 16GB should be plenty big enough for this.
- Once Imager is installed, launch it.
- Note: I am doing this on Ubuntu, but it should be similar on MacOS and Windows

- Note: I am doing this on Ubuntu, but it should be similar on MacOS and Windows
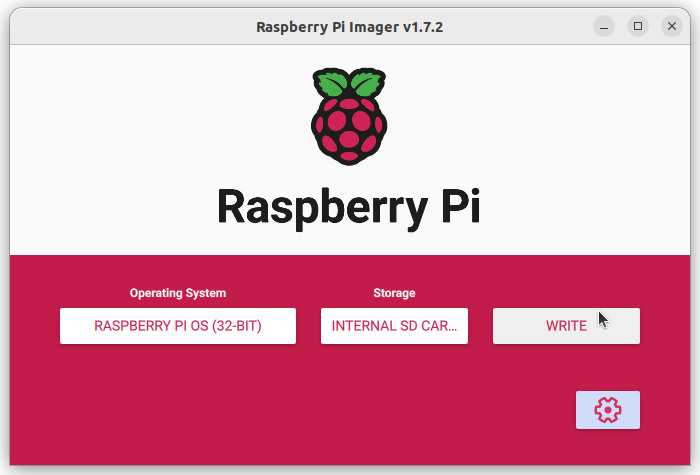
- Click the CHOOSE OS button
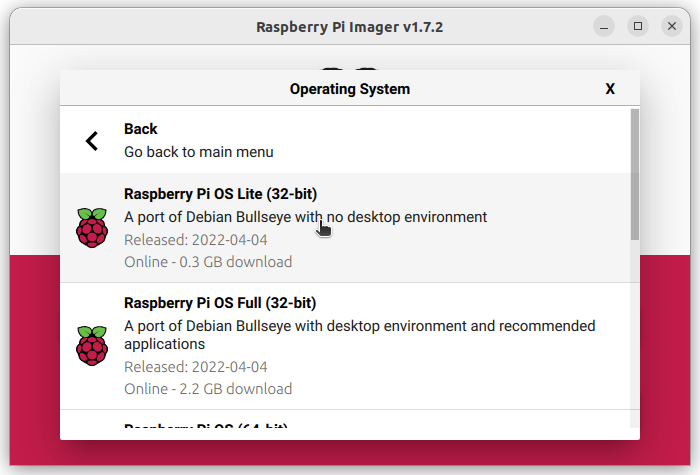
- Click the Raspberry Pi OS (other) option in the list

- Click the Rasberry Pi OS Lite (32-bit) option in the list
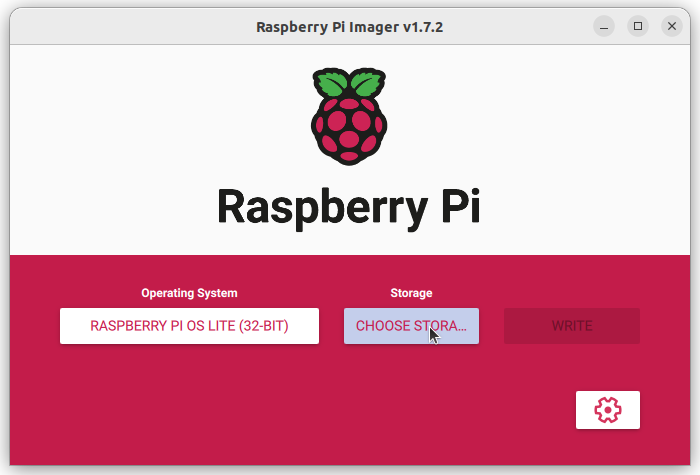
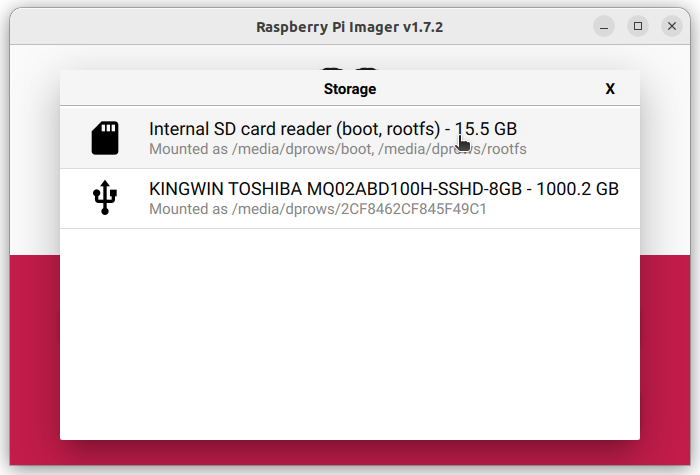
- Click the CHOOSE STORA… button
- Click the SD card you inserted in step 2
- Click the Gear Cog button
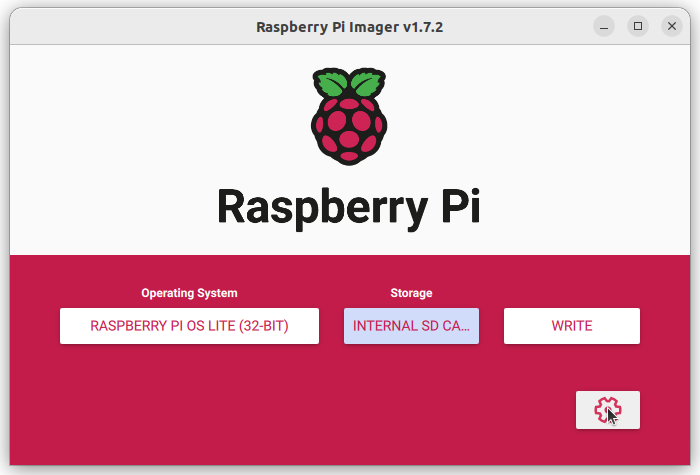
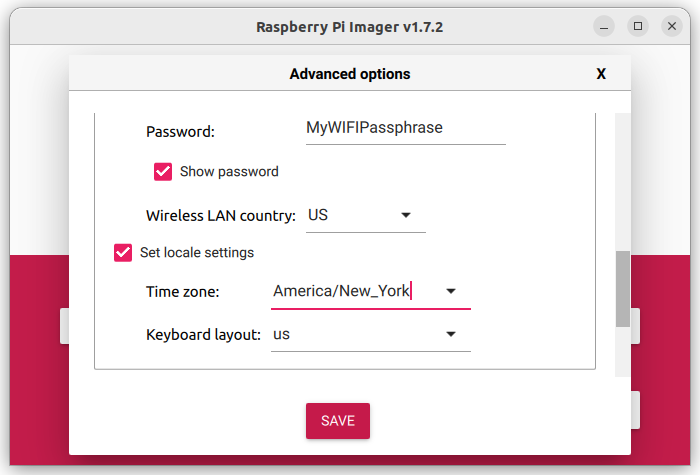
- Fill out the items in the following images to fit your environment and then click the SAVE button.
- It is important to set all of this up now as it will make it where you don’t need to change the configuration once you put it into your RPi. Make sure you enable SSH, set a username and password, and make note of the username and password as you will need that to SSH into the device.
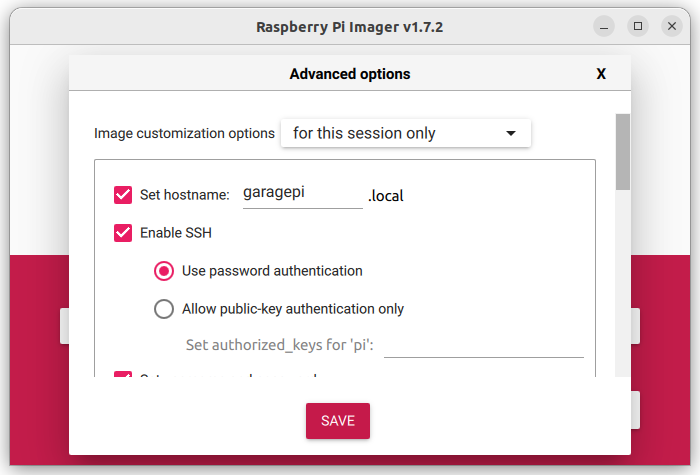
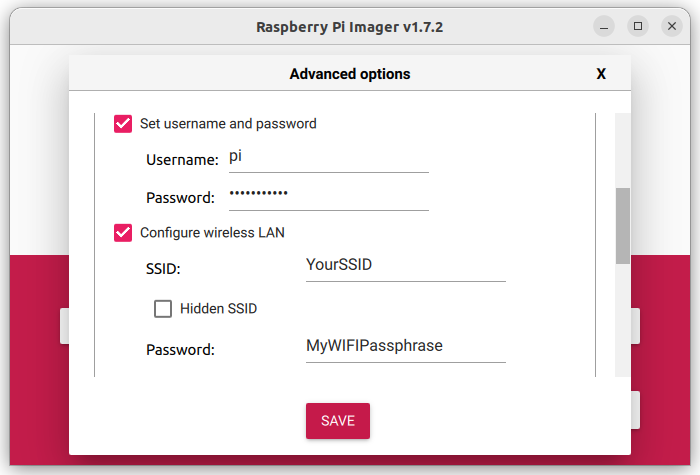
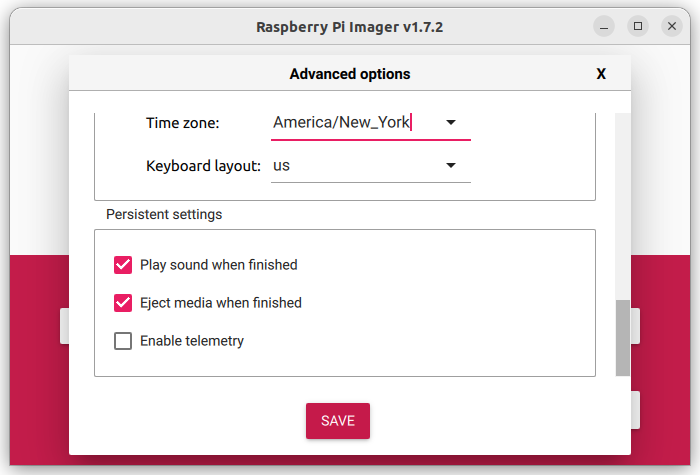
- It is important to set all of this up now as it will make it where you don’t need to change the configuration once you put it into your RPi. Make sure you enable SSH, set a username and password, and make note of the username and password as you will need that to SSH into the device.
- Click the WRITE button
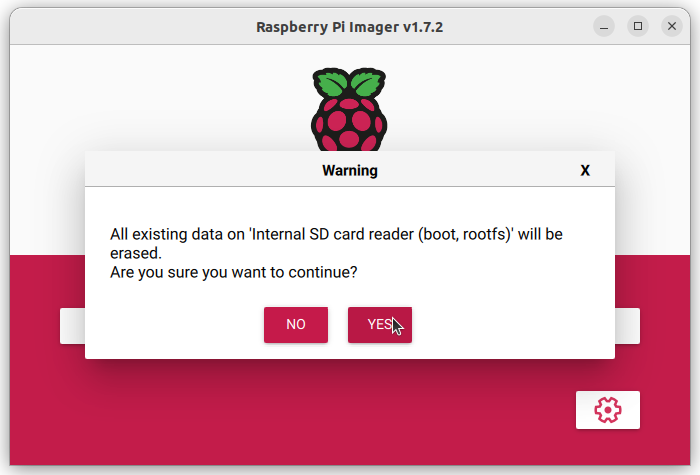
- Click the YES button to confirm you want to continue and erase anything that may exist on the SD card
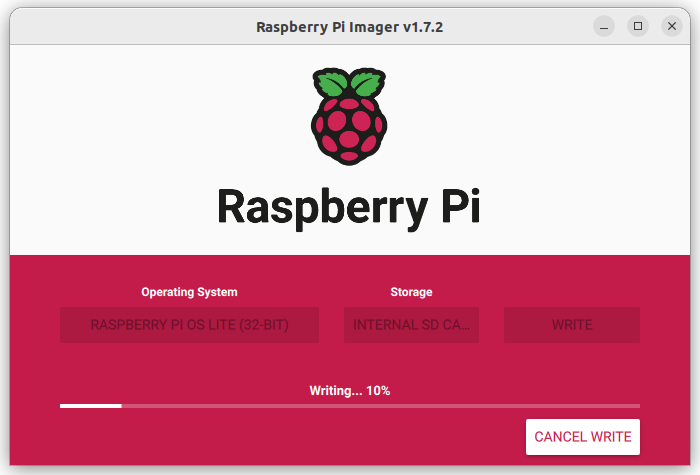
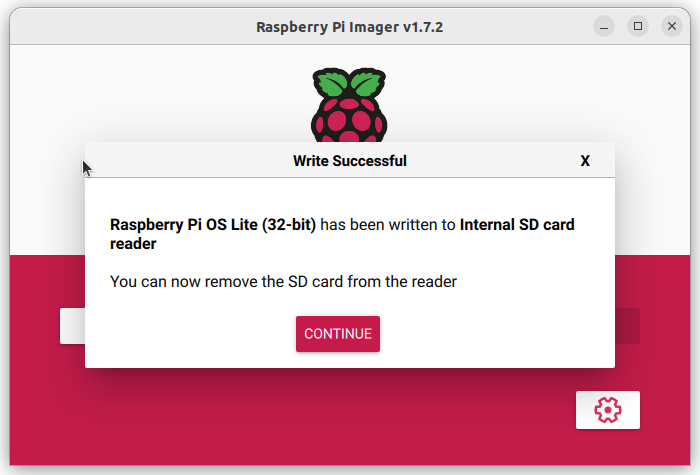
- It will take a few minutes for the process to complete.
- Once it has completed, remove the SD card from your computer and click the CONTINUE button
- Close out of Imager on your computer
- Put the SD card into your RPi
Setting up MQTT on the GaragePi
To control the GaragePi with MQTT, we need to install some items on the Pi. Since we installed Rasberry Pi, there is no GUI (Desktop) to use. Everything is done through command line (aka shell). You will need to either connect a keyboard and monitor to the GaragePi or use a Terminal or Putty to SSH into the device. If you are going to connect a Monitor and Keyboard, then start with step 4.
-
Run the following command in a terminal or putty session, where “ipaddress” is the actual IP address of your GaragePi
ssh pi@ipaddress - Enter the password you entered in step 10 above
- Press Enter
-
Run the following commands
 sudo apt-get update && sudo apt-get dist-upgrade -y
 sudo reboot
sudo apt-get install supervisor sudo apt-get install python3-pip sudo pip install --upgrade virtualenv cd /home/pi virtualenv ve . ve/bin/activate pip install pi-mqtt-gpio pip install RPi.GPIO -
Configure the pi-mqtt-gpio app by modifying ~/pi-mqtt-gpio.yml
nano ~/pi-mqtt-gpio.yml- Below is my configuration. You will need to modify it to use your mqtt_broker_ip and mqtt_broker_port (IP of Home Assistant if following this whole guide and default port of 1883) and user and password (This would be the username and password we took note of in step 17 of the mqtt setup on Home Assistant)
- I used GPIO pins 23, 24, 25, and 26 to control the relays. Two are for the garage door openers and 2 are for the lights on the garage door openers.
- I used GPIO pins 21 and 17 as inputs for the magnetic switches (to know if the doors are open or closed)
- I used GPIO pin 13 as input for a motion sensor switch (used to turn lights on automatically)
mqtt: host: mqtt_broker_ip port: mqtt_broker_port user: "homeassistant" password: "page2kaedaecaitei0ooqu8zeiph5jahf3Shee9aedieX2Oophae7rahtheighae" topic_prefix: home/garage status_topic: status status_payload_running: online status_payload_stopped: offline status_payload_dead: dead discovery: on gpio_modules: - name: raspberrypi module: raspberrypi digital_outputs: - name: switch23 module: raspberrypi pin: 23 #GPIO on_payload: "ON" off_payload: "OFF" inverted: true initial: high - name: switch24 module: raspberrypi pin: 24 #GPIO on_payload: "ON" off_payload: "OFF" inverted: true initial: high - name: switch25 module: raspberrypi pin: 25 #GPIO on_payload: "ON" off_payload: "OFF" inverted: true initial: high - name: switch26 module: raspberrypi pin: 26 #GPIO on_payload: "ON" off_payload: "OFF" inverted: true initial: high digital_inputs: - name: sensor21 module: raspberrypi pin: 21 # GPIO on_payload: "ON" off_payload: "OFF" pullup: yes pulldown: no - name: sensor17 module: raspberrypi pin: 17 # GPIO on_payload: "ON" off_payload: "OFF" pullup: yes pulldown: no - name: sensor13 module: raspberrypi pin: 13 # GPIO on_payload: "ON" off_payload: "OFF" pullup: yes pulldown: no -
The next step is to setup pi-mqtt-gpio as a daemon so it will run when the pi is restarted. To do this, you need to create a supervisor config: /etc/supervisor/conf.d/pi-mqtt-gpio.conf
sudo nano /etc/supervisor/conf.d/pi-mqtt-gpio.conf -
Enter the following
[program:pi_mqtt_gpio] command = /home/pi/ve/bin/python -m pi_mqtt_gpio.server pi-mqtt-gpio.yml directory = /home/pi redirect_stderr = true stdout_logfile = /var/log/pi-mqtt-gpio.log - Press Ctrl + X
- Press Y that you want to save the modified buffer
- Press Enter to confirm the name of the file (keeping the name listed)
-
Update the Supervisor using the follwoing commands:
sudo supervisorctl update sudo supervisorctl status -
To ensure the GPIO pins start up with the right levels, you need to edit /boot/config.txt by adding the following at the end of the file:
# Custom Setting for GPIO on startup # Set GPIO23, 24, 25, and 26 to be an output set to 1 gpio=23,24,25,26=op,dh -
To edit the /boot/config.txt file:
sudo nano /boot/config.txt - Press Ctrl + X
- Press Y that you want to save the modified buffer
- Press Enter to confirm the name of the file (keeping the name listed)
This completes the GaragePi side of the setup.